
If you’ve ever looked at a piece of EVA foam and wished that you could sculpt it into something more three-dimensional, then foam clay is the product you’ve been waiting for! Ever since the Phoenix Sisters discovered that foam clay was a thing a few years ago, it’s become a staple in our crafting toolbox. This material is versatile, relatively inexpensive, and easy to work with. We’re pretty much obsessed! Read on for everything you need to know about this must-have material.

As most of us ‘elder cosplayers’ know, new materials come along every few years that change the craft and revolutionize how things are created, while also making our lives easier. Thermoplastics like Wonderflex definitely upgraded armor-making back when they first hit the market, and of course EVA foam has become the material of choice for so many cosplayers of any skill level in recent years. Four way stretch spandex is yet another game-changer. But aren’t we all forever chasing that next ‘new’ thing that will make our lives easier? All while picking costumes that are ever more challenging? No? Just us crazy folk? (Let’s be real, if you’re reading this article, you’re at least thinking about cosplay, and that makes you our kind of crazy.)
Either way, foam clay will certainly make some crafter’s lives easier. And if this sounds like an advertisement, alas, it is not. We aren’t being sponsored by any foam clay brands… Yet. (If you’re a name brand cosplay supply company-HI! Call us??)
The Phoenix Sisters have the details for you here.
-The only con: Foam Clay needs several hours to cure.
The one potential downside is that you can’t whip up props with your clay in a hurry. You need to plan ahead of time. Foam Clay has a cure time of six to twelve hours, depending on piece size. The larger pieces will absolutely need the full twelve hours to set. In a pinch, it can be paintable in a shorter time frame, but you still want to allow the full cure time before taking it to a con or wearing it on your body. The plus side of this is that you can tweak the shape of your piece as it dries if you need to. Often, you’ll be able to reshape things as the piece sets, which allows you to take your time with the sculpting and perfecting of the piece.
-It also works as an adhesive.
Even if you’re not a sculptor, you may want foam clay in your crafting arsenal. Upon applying, it starts out sticky, so can be used to seal other pieces of EVA foam or even other lightweight objects if needed. Be mindful of this when first applying, but it comes in handy for a lot of things. Most recently, Kelly’s used it to stick pins to the back of her Megara swirl adornments and for sealing two pieces of foam along with some floral wire to create a comic-style speech bubble headpiece. Crayle is using it to apply push pin attachments with rubber backing to her Necromonger spine piece. The foam covers the metal pin, and after it cures, she can pin the spine to any shirt or top, and then put a rubber back on it.

Necromonger Spine Piece
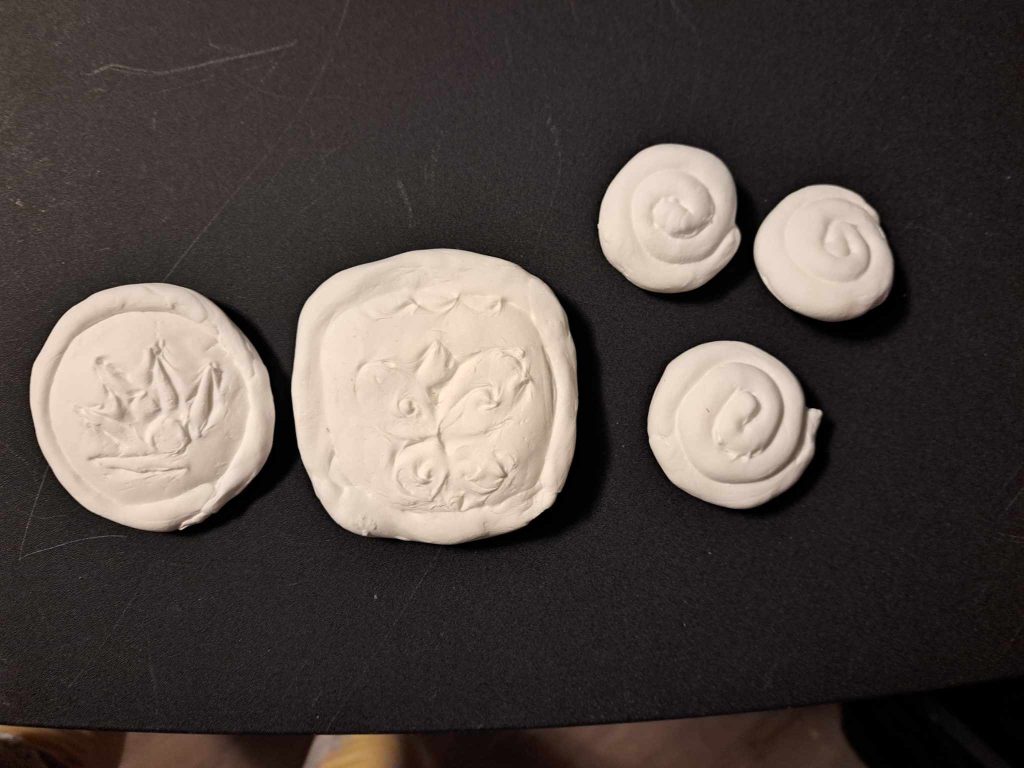
Megara & Valka Pins
-It’s really lightweight and a little squishy when it dries.
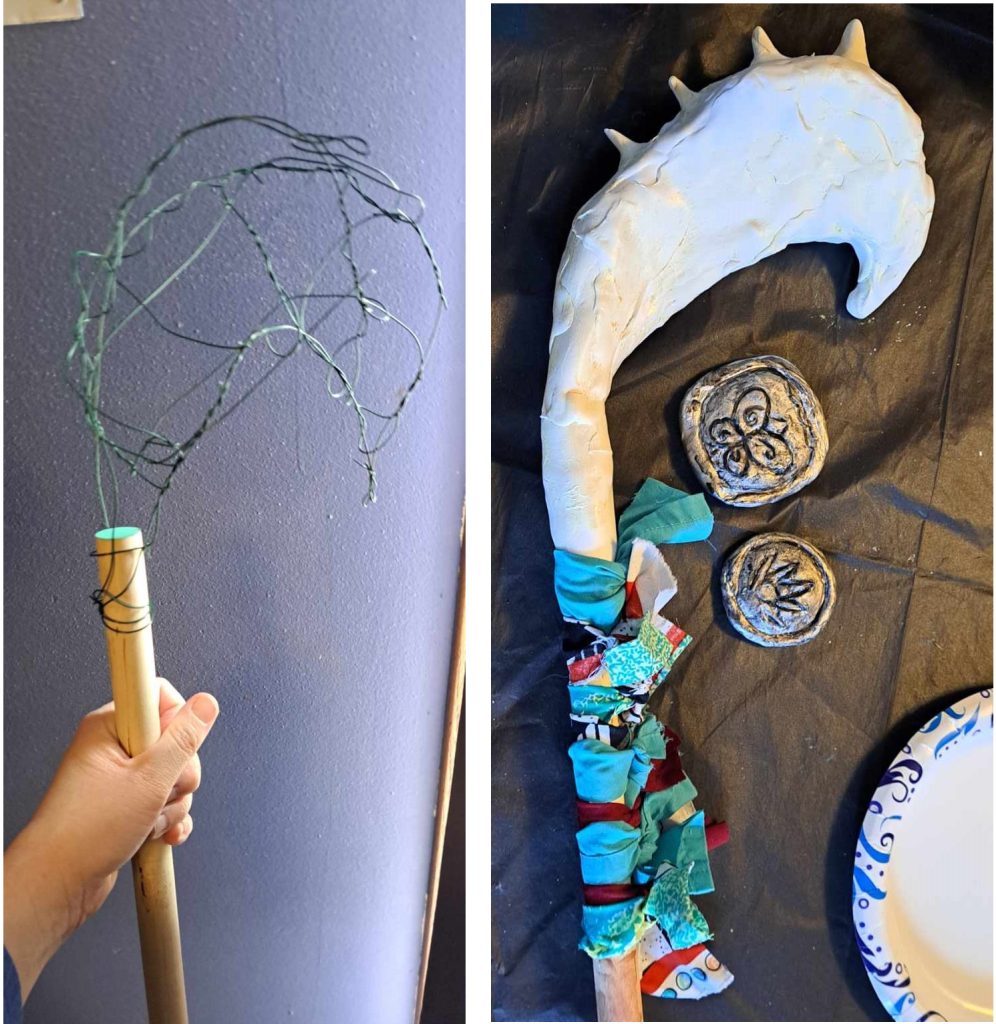
This is a great feature for when you need a prop or armor that’s not going to add a ton of weight to your costume! As we all know, walking around a con can be a long slog, so it’s nice to have armor that looks great but isn’t heavy. The one thing to be mindful of is that larger pieces will need some sort of support as the clay itself can’t sustain a large shape without some sort of skeletal structure. We learned that the hard way with Crayle’s Emma Frost staff. The staff head started to collapse in on itself as it dried, so Crayle had to do some reshaping. It still turned out alright but wasn’t quite like the original vision she had in mind.
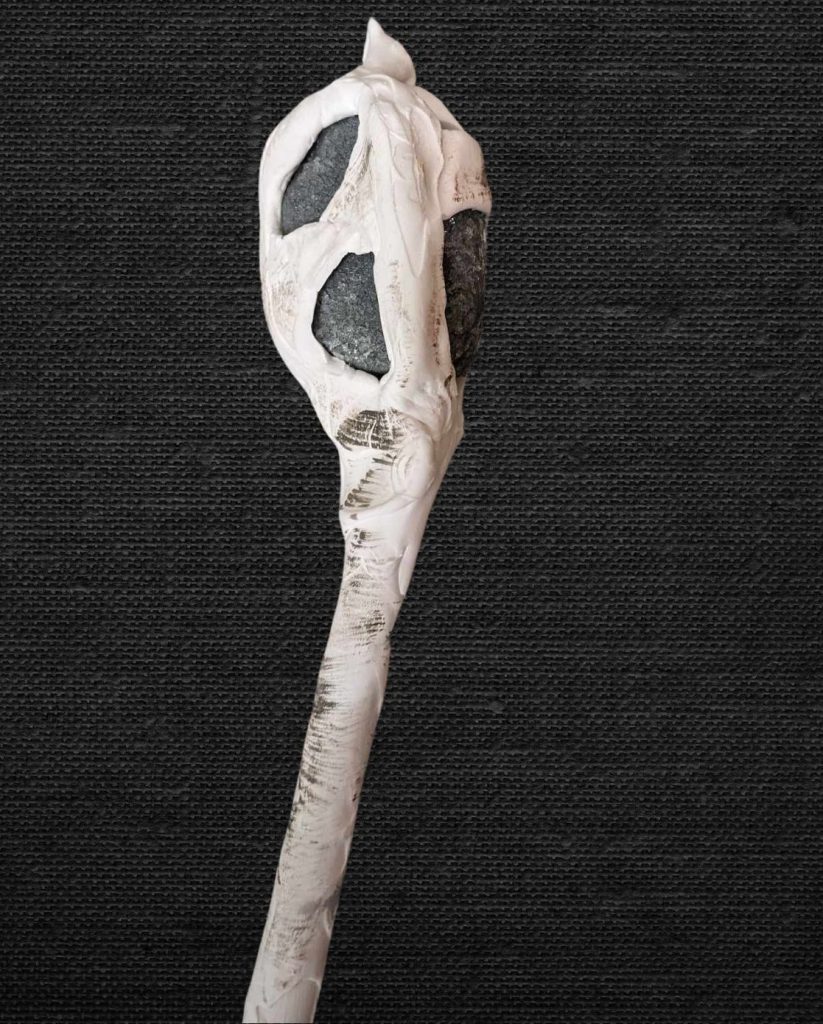
Kelly applied these lessons when making a bone hook for Valka, and used floral wire and duct tape to make a skeleton for the bone (ha-get it??) hook before applying the clay. It helped the hook to hold its shape as it dried and made it sturdier. And the final product looks amazing, if we do say so ourselves.
-It’s sandable!
If you didn’t get a perfectly smooth coating or surface when you sculpted it, you can sand pieces after they’ve cured. Overall, foam clay is very forgiving, and can be altered and improved at almost every point in your crafting process. The tweak-ability is a huge plus.
-And also paintable!
The best part about foam clay is that you can paint it. This is important, as we all know that the best cosplay comes in COLOR. We’ve had great luck with using primer, plasti-dip spray, and spray paint, but we’ve also been able to paint the clay directly with acrylic paints. It takes color beautifully and even more importantly, it can be used to protect softer foams (like Styrofoam floral balls) that might melt when spray painted. Pictured below: The Hawkgirl mace that was made out of a Styrofoam floral ball and Styrofoam spikes and covered in foam clay to create texture and protect the Styrofoam from melting for paintability. Look for a follow-up article for a full how-to detailing the construction process of this mace!

-A little goes a long way.
The Phoenix Sisters have been very happy with how much we’re able to accomplish with a single tub of foam clay. Coating a piece or sculpting something usually only takes a few ounces of the foam clay at a time. Crayle’s Emma Frost staff used less than one third of a tub of our foam clay. This is great news for cosplayers looking to keep things cost-effective. In addition to the fac that the tubs are usually inexpensive to start.
So what are you waiting for? Grab yourself a bucket of foam clay and get experimenting!